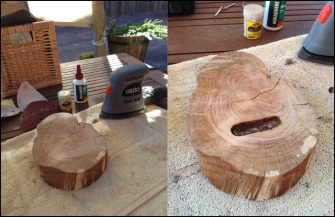
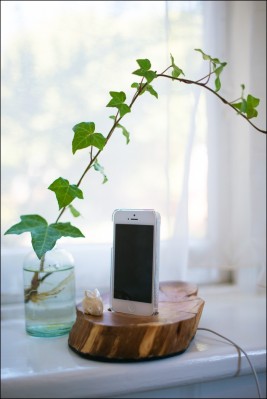
This iPhone stand charges your phone while adding a unique rustic touch to a space. It may take some time to create this but it will definitely be worth it!
Supplies needed includes..
- piece of wood
- lightning cable
- sand paper
- dremal or rotary hand tool
- hot glue gun
- drill
- cabinet makers wax
- thick, self adhesive felt base
Steps
- First make sure your wood is the thickness and size you want it to be (use a hand saw if needing to be cut)
- Sand down your piece of wood to the texture you prefer
 3. Use your rotary hand tool to carve out the recess for your phone
4. With the cabinet maker wax, smooth the groove and buff the entire piece of wood
5. Use the drill to create a hole in the center of the groove for your cord
6. The next step is to use the dremel to carve out a path for the rest of the cable on the underside of the dock (carve it deep so that the dock will sit perfectly flat)
 7. Add glue from the hot glue gun onto the charging cord before placing it into the hole
8. Fill the remaining gaps in the hole with hot glue, and when it’s cool flip it over and do the same at the bottom
 9. Last step is to apply a layer of thick, self-adhesive wool felt on the base. It’s designed to protect the surface that your dock will sit on, but also serves to hide messy cables and keep your dock perfectly flat
Quick summary of the steps
Carve a spot for your phone to sit in. Smooth, polish or stain your wood to your heart’s content. Drill a hole for the cable, and glue it in place so that it won’t budge. Flatten the base somehow.
